The Kitchener Stitch, also known as grafting, is a fundamental knitting technique used to seamlessly join two sets of live stitches, creating an invisible finish in projects like socks and scarves.
What is the Kitchener Stitch?
The Kitchener Stitch is a knitting technique used to graft two sets of live stitches together seamlessly, creating an invisible join. It is essential for projects like socks, scarves, and mittens, where a smooth finish is desired. This method involves using a darning needle to weave yarn through stitches on two knitting needles, mimicking the appearance of knit and purl stitches. The process ensures that the join is flexible and nearly undetectable, making it ideal for garments requiring a professional finish. Proper tension and careful stitching are key to mastering this technique.
Importance of the Kitchener Stitch in Knitting
The Kitchener Stitch is a crucial technique in knitting, enabling seamless and invisible joins between two sets of live stitches. It is particularly vital for projects like socks, scarves, and mittens, where a professional finish is desired. This technique ensures that the join is flexible and durable, maintaining the fabric’s integrity without bulky seams. By mastering the Kitchener Stitch, knitters achieve a polished look, making it an essential skill for both beginners and experienced crafters aiming for high-quality results.
Materials Needed for the Kitchener Stitch
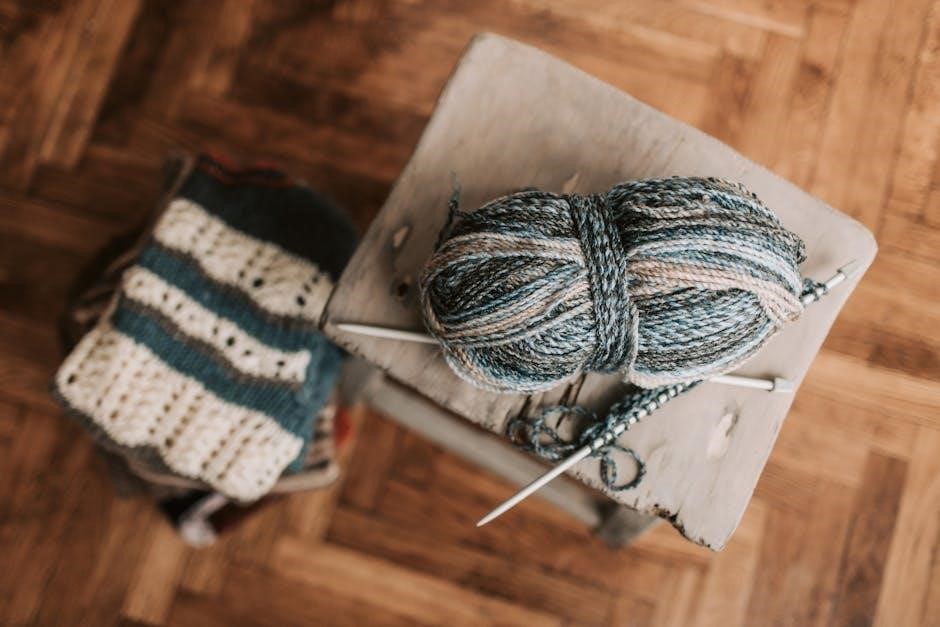
To perform the Kitchener Stitch, you’ll need yarn, knitting needles (4.50 mm/US 7), and a darning needle for grafting. Use two strands of yarn for strength.
Yarn and Needles Requirements
To perform the Kitchener Stitch, you’ll need a pair of knitting needles (4.50 mm / US 7) and a darning needle for grafting; Use the same yarn as your project to ensure a seamless finish. The needles should be circular or straight, depending on your preference, and match the gauge of your knitting. A smooth, durable yarn is ideal for grafting, as it allows for even tension and a nearly invisible join. Ensure your yarn tail is long enough to complete the graft without running out midway.
Darning Needle for Grafting
A blunt-tipped darning needle is essential for the Kitchener Stitch, as it prevents splitting the yarn. Thread the needle into the first stitch on the front needle as if to purl, then draw it through without crossing under the needles to avoid visible lines. Ensure the needle moves smoothly between stitches, maintaining even tension for a seamless join. This technique ensures the graft remains invisible, making it ideal for finishing projects like socks or scarves. Proper use of the darning needle is key to achieving a professional finish.
Measuring Tape for Accuracy
A measuring tape is essential for ensuring accuracy in your Kitchener Stitch project. It helps verify that both pieces being grafted are of equal length, preventing uneven joins. By measuring before you start, you can adjust your stitches or tension to match perfectly. Proper alignment is crucial for a seamless finish, and the measuring tape guides you to achieve this effortlessly. It’s a simple yet vital tool to ensure your grafting looks professional and maintains the integrity of your knitting pattern.
Preparation Steps for the Kitchener Stitch
Thread your darning needle and ensure your knitting needles are properly set up with live stitches. Measure your work to maintain accuracy before grafting begins.
Setting Up Your Knitting Needles
To set up your knitting needles for the Kitchener Stitch, hold the two needles parallel, ensuring the right sides face you. The needle with the first stitch to be grafted should be in front. Make sure both needles have an equal number of stitches and that the working yarn is on the right side of the front needle. Keep the needles taut but not overly tight, as this will help maintain even tension during grafting. Proper alignment is key for a seamless join. Use a darning needle for threading the yarn. Ensure stitches are evenly distributed to avoid misalignment. Proper setup ensures a smooth grafting process, making the Kitchener Stitch invisible and professional. Always verify needle positions before starting to sew. This step is crucial for achieving the desired result.
Threading the Darning Needle
Threading the darning needle is a crucial step in preparing for the Kitchener Stitch. Begin by threading the yarn through the eye of the darning needle, ensuring it is securely in place. Insert the threaded needle into the first stitch on the front needle as if to purl, drawing the yarn through without crossing over the needles. Repeat this process for the back needle, inserting the needle as if to knit. Keep the yarn below the needles to maintain even tension and avoid crossing, ensuring a smooth grafting process. This setup mirrors the natural flow of the stitches, making the join nearly invisible.
Step-by-Step Instructions for the Kitchener Stitch
Learn the Kitchener Stitch with easy steps: alternate front and back needle stitches, inserting the darning needle as if to purl on front and knit on back, creating a seamless join.
Basic Steps of the Kitchener Stitch
Begin by threading a darning needle with the yarn and inserting it into the first stitch on the front needle as if to purl. Draw the yarn through, then move to the back needle, inserting the needle into the first stitch as if to knit. Continue alternating between the front and back needles, working one stitch at a time. For knit stitches, the needle goes in as if to knit, and for purl stitches, as if to purl. Maintain even tension to ensure a seamless join, and weave in the ends securely to complete the graft.
Front Needle Instructions
For the front needle, insert the darning needle into the first stitch as if to purl and draw the yarn through. Next, insert the needle into the second stitch as if to knit and draw the yarn through. Repeat this process, alternating between purl and knit stitches. Ensure the tension remains even to maintain a seamless join. Work carefully to avoid crossing the yarn or creating loose stitches. This method ensures the front needle stitches are grafted invisibly, matching the fabric’s texture perfectly. Keep the yarn taut but not overly tight for professional results.
Back Needle Instructions
For the back needle, insert the darning needle into the first stitch as if to knit. Draw the yarn through, then move to the next stitch and repeat the process. Alternate between purl and knit instructions to maintain the fabric’s texture. Ensure the yarn tension matches the surrounding stitches for a seamless join. Continue this sequence until all back needle stitches are grafted, mirroring the front needle’s actions to achieve an invisible finish. Proper alignment and even tension are key to a professional-looking result.
Handling Knit and Purl Stitches
When working the Kitchener Stitch, it’s essential to alternate between knit and purl stitches seamlessly. For knit stitches, insert the darning needle into the first stitch on the front needle as if to knit and draw the yarn through. For purl stitches, insert the needle as if to purl and gently pull the yarn. On the back needle, repeat the process, ensuring the stitches align to maintain the fabric’s texture. Keep the tension even and avoid crossing the yarn to achieve a smooth, invisible join.
Completing the Graft
Once all stitches are sewn, secure the yarn by pulling gently to tighten the final loop. Weave the yarn tail through the fabric to hide it. Ensure the graft is even and invisible by maintaining consistent tension. For a polished finish, use a tapestry needle to weave in ends. If needed, block the project to blend the graft seamlessly with the surrounding fabric. Refer to PDF guides for visual aids to confirm a professional-looking result.
Tips for Success with the Kitchener Stitch
Maintain even tension while grafting to ensure a seamless join. Avoid pulling the yarn too tightly, as this can pucker the fabric. Practice regularly to build confidence and precision, and always use a darning needle for smooth stitching.
Maintaining Even Tension
Maintaining even tension is crucial for a seamless finish when using the Kitchener Stitch. Tight stitches can create puckering, while loose stitches may result in noticeable gaps. To achieve consistency, gently pull the yarn after each stitch, keeping the tension similar to the surrounding fabric. Use a darning needle to weave in ends carefully, ensuring the yarn lies flat. Even tension ensures the join remains invisible and comfortable, especially in garments like socks or scarves. Practice on swatches to develop a steady hand and a natural feel for the right tension.
Practicing the Stitch
Mastering the Kitchener Stitch requires consistent practice. Begin with scrap yarn to familiarize yourself with the process. Start by setting up your needles correctly, ensuring even tension. Use a darning needle to weave through stitches smoothly. Follow the step-by-step instructions in your PDF guide, paying attention to knit and purl stitch handling. Practice on swatches before applying it to actual projects. Watching video tutorials alongside your PDF can enhance understanding. Regular practice will build confidence and ensure a professional finish in your knitting endeavors.
Troubleshooting Common Issues
Troubleshooting the Kitchener Stitch involves identifying uneven stitches and adjusting yarn tension for a seamless finish. Ensure all stitches are properly sewn and trim excess yarn neatly.
Fixing Uneven Stitches
Uneven stitches can occur due to inconsistent yarn tension during grafting. To fix this, gently stretch the fabric to identify tight or loose areas. Use a tapestry needle to weave yarn through problematic stitches, adjusting tension as needed. If stitches are too tight, carefully pull up slack while maintaining the stitch pattern. For loose stitches, tighten by threading yarn back through the stitch in the opposite direction. Ensure evenness by working methodically across the graft line, checking each stitch to achieve a seamless finish; Regular practice improves tension control, minimizing the need for corrections.
Dealing with Yarn Tension Problems
Managing yarn tension is crucial for a seamless Kitchener Stitch. If the yarn is too tight, it can pucker the fabric, while too loose may leave visible gaps. To avoid this, work slowly and maintain consistent tension. Use the darning needle to gently pull the yarn after every few stitches to even it out. If tension issues persist, practice with scrap yarn to develop a steady hand. Referencing a PDF guide can also provide visual cues to help master even tension, ensuring a professional finish for your knitting projects.
PDF Resources for the Kitchener Stitch
Downloadable PDF guides, like Julia Adams’ tutorial, offer step-by-step instructions and visuals for mastering the Kitchener Stitch, making learning easier and more accessible for all skill levels.
Downloadable Guides and Tutorials
Downloadable PDF guides and tutorials provide clear, step-by-step instructions for mastering the Kitchener Stitch. Resources like Julia Adams’ photo tutorial offer visual aids and detailed directions, making it easier to learn. Many patterns, such as the Basic Mitten knitting guide, include Kitchener Stitch instructions specifically for beginners. Additionally, platforms like the Crazy Sock Lady YouTube channel offer demonstrations, while downloadable graphics summarize the stitch process. These resources ensure that knitters can practice and perfect the technique at their own pace, with accessible and comprehensive materials always available.
Benefits of Using a PDF Tutorial
A PDF tutorial provides a structured, visually guided learning experience, making it easier to master the Kitchener Stitch. It includes step-by-step photos, charts, and clear instructions, ensuring clarity. Offline accessibility allows you to practice anywhere, while the ability to print or zoom in enhances convenience. PDFs are ideal for both beginners and experienced knitters, offering a permanent reference that can be revisited as needed. This format ensures that you can follow along seamlessly, without the distractions of online content, making the learning process more efficient and enjoyable;
Mastering the Kitchener Stitch is essential for achieving a flawless, invisible finish. Use downloadable PDF guides for clear instructions and practice to ensure perfect results every time.
Final Thoughts on Mastering the Kitchener Stitch
Mastery of the Kitchener Stitch unlocks a professional finish in knitting, ensuring an invisible join that enhances the beauty of your projects. With consistent practice and attention to tension, even the most challenging stitches become manageable. Utilizing downloadable PDF guides and step-by-step tutorials can significantly ease the learning process. Embrace patience and persistence, as this technique is a valuable skill that elevates your knitting repertoire. Over time, you’ll find the Kitchener Stitch becomes second nature, allowing you to craft seamless and polished garments with confidence.